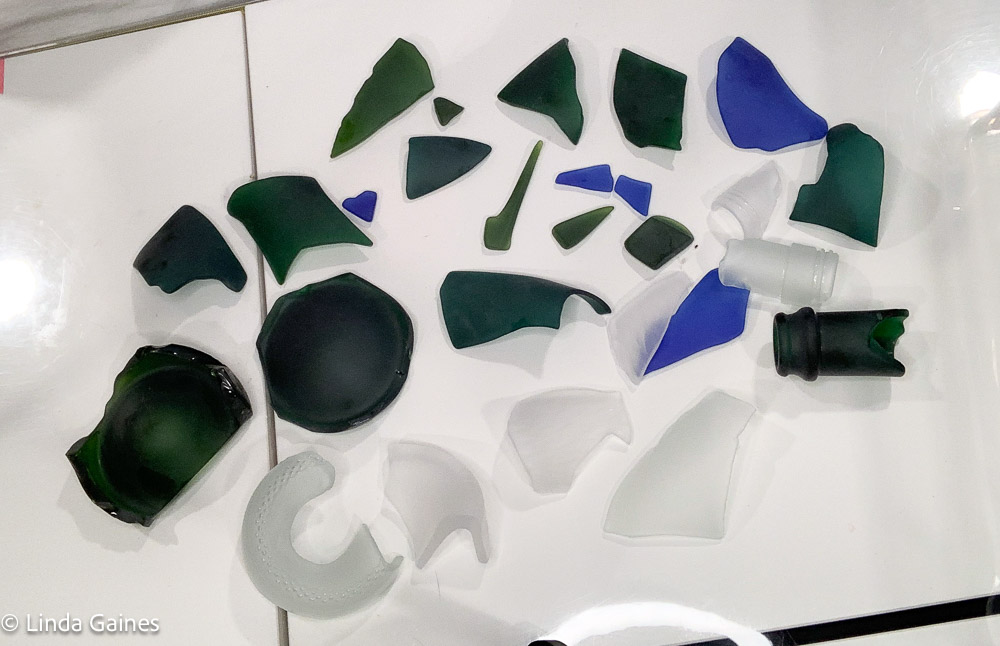
I have started making sea glass to use in some of my art projects. Of course, it is not real sea glass, but I have been able to make glass get that sea glass look of smooth edges and a sort of frosted texturing. Before I started making it myself, I was able to find some information on the internet as to how to do it, but most of the information was lacking important details as to how to do it successfully. I will describe below how I do it, in case it is of use to others. Also below is the video I have posted on YouTube where I also explain how to do it. [Note: Below I mention a few brand names to provide the details of what I use and works for me. I do not receive nor am I seeking any financial incentives on any products.] Below are some examples of sea glass I have made. Notice the bottle tops and bases and the variety of colors.

If the glass was molded with a pattern then after tumbling, it should still have the pattern, but the pattern will be more subdued. Below are a couple of pieces of clear glass that had a diamond pattern originally, and the pattern is still visible after tumbling.

Thus far, I have only used wine bottles to make sea glass. Depending on the type of wine, you can find wine bottles that are clear, blue, and green. Some bottles, at least beer bottles, can be brown, so you can get a nice selection of colors. Wine bottles are very strong. I normally have to hit the bottle numerous times before it breaks. I think where the neck meets the wider part of the bottle may be the weaker area. The bottom of the bottle is particularly thick and strong and can be difficult to break. The top of the bottle is also fairly strong normally. Finally sparkling wine bottles are even stronger than still wine.
I like to clean the wine bottle before breaking it. I soak it in soapy water to remove the labels. This is probably not necessary as the grit scratches the glass, so I am sure it will remove the labels. However, removing the labels before tumbling it ensures that there is not bits of label and adhesive in the liquid after tumbling and provides a cleaner process.
First, to make sea glass, it is important to have proper personal protective equipment. Mainly, wear eye protection when breaking glass. I also recommend wearing a respirator at least while using the grit. I also wear the respirator while breaking the glass, so I don’t breathe in any small glass particles that may become airborne. I also use nitrile gloves to protect my hands from small bits of glass. Although these types of gloves will not protect me from cutting myself with a large piece. To break the glass, you just need a hammer, but I also use a large pair of pliers to remove small bits of glass from a larger piece. I break the glass in a cardboard box that I have covered the edges with packing tape to try to keep all the glass bits inside. Finally, I cover the glass with more cardboard and a towel while breaking it.

I put the bottle in a cardboard box that as I mentioned above, I sealed the corners with packing tape to keep the glass bits inside. I then cover the bottle with more cardboard and a towel. Then I hit it however many times needed until it breaks. Once it breaks, I check the size of the pieces, and any piece that I like as is, I put into the tumbler drum. I continue breaking the larger pieces until they are the size I want. If a glass piece has a small bit or edge that I want removed, a large pair of pliers to remove or crush the little bit I want to remove. Breaking the bottle bottom is particularly difficult, so many times, I just break off as much of the sides as possible and then tumble the bottom as one piece.

Once I have enough glass pieces to fill a rock tumbler drum, I put the filled drum on a scale to check the weight. Tumbler drums are designed for a specified weight, so check the contents do not weigh too much. I then add pea gravel to the drum and tap the drum to get the pea gravel to disperse down and fill the gaps. I use pea gravel sold for use in aquariums. I got this idea from a YouTube video by Agate Ariel. The pea gravel will help tumble the glass and importantly prevent it from breaking too much by constantly hitting other glass. Normally after adding the gravel and repeatedly tapping the drum, I have to remove some glass pieces that no longer fit in the drum because there needs to be space between the contents and where the lid sites.

After I have the appropriate volume of glass and pea gravel and check the weight again, I then add water to about the top of the contents, again, leaving air space below where lid sits. Then I add two tablespoons of stage 1 grit for rock tumbling. I use Polly Plastics brand grit.

Then I close the tumbler drums per the directions of the manufacturer and place on the tumbler. I let them tumble for a week. I am not sure how long they really need, but a week works for me, including working with my work schedule. Of note, my tumbler is Leegol Electric Rock Tumbler Double Drum. I estimate its rotation speed as about 42 rpm. I mention this because when searching for information on making sea glass, I saw something that said most tumblers rotate at too high a speed and will break the glass. My tumbler is probably on the slower side, which may work in my favor for good sea glass results.

After a week, I open up the drums and everything is nice and mixed as shown below. Note I open up the drums and clean everything outside. Do not pour the liquid with all the grit down the drain. You can damage your pipes if you do.

I pour the contents of the drums into a colander to catch the glass and pea gravel. I use the pea gravel over and over again once cleaned. I then rinse out the drums and pour all the rinse water into the colander.

I then rinse everything thoroughly with water. The resultant water from this stage I later throw into my yard.

I then pour the glass and pea gravel into another bucket and mix in a little bit of dish detergent with water. The detergent helps to remove any leftover grit and gets everything nice and clean. I pour the resultant water which has a little bit of detergent and a tiny bit of grit down my driveway. Then, I just let everything dry. I check each piece individually. If there are any sharp edges, I just put the piece back in the tumbler for another week. Finally, now I have sea glass as shown at the top to use in my projects.
For more information, see my video of this on YouTube.
2 responses to “Making Sea Glass”
Interesting and very informative. Everything was covered especially safety information for your safety as well as for the environment.
[…] have made a lot of sea glass and am happy with the results. I decided to experiment and see if I could create a similar effect […]