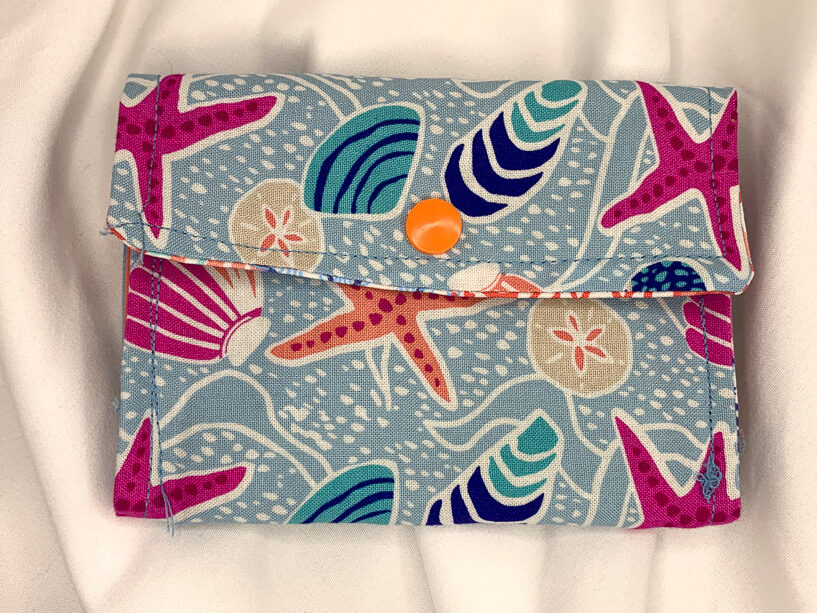
One of my better selling items is a card holder that can work as a wallet if the money is folded. It fits both business cards and credit cards, but I design it for credit cards by using RFID protective fabric in it. It is rather easy to make, and below are the complete directions how to make.

For materials, I use:
- One piece of 9.75 x 5.75 inches fabric for the exterior
- One piece of 9.75 x 5.75 inches fabric for the interior lining
- Four pieces of 6.75 x 5.75 inches fabric for the pockets
- One piece of 9.5 x 5.5 inches RFID protection fabric
- A snap or button to close the card holder

The first step is to make three double layered pieces. Sew the two big pieces together, good side to good side, with the RFID protection fabric sewed to them also. Thus, the RFID protection fabric will be hidden in between the two pieces. Also, sew the smaller pieces together similarly in pairs. With all pairs of fabric, leave an opening, so they can be turned inside out.

Trim a little triangle of fabric off the corners to remove bulk when turning the fabric inside out.

Turn the fabric inside out. Then top stitch to sew the opening closed and keep the pieces flat.

Take the two smaller pieces and stack them together such that the long edges are the vertical sides. On one of them, draw in chalk sew lines that will form a rectangle with the top edge of one piece. The two vertical sides of the drawn rectangle will be 2.5 inches long and spaced 0.75 inches from each edge. That will make the bottom side of the rectangle 3.75 inches centered on the short side of the fabric. The below photo shows how the chalk lines should look.

Sew on the chalk lines. This will form the first and smallest pocket.

Fold the top piece of the stacked pieces in half, so that the bottom now sits atop the new pocket.

Flip the pieces over, and repeat with the other short piece, folding in half, so that the bottom edge aligns with the sewn pocket.

Place the folded short pieces on top of the bottom of the longer fabric piece. The tops of the short pieces should align with the bottom, so that the openings of the folds aligns with the bottom. Notice in the below photo, the inner fabric of the long piece is directional (coral), so it is easier to see the folded pieces are placed at the bottom.

Now for the slightly tricky part. Pull back the top two layers (or the top piece) of the folded short pieces, and sew from the bottom of the stacked pieces to the end of the folded pieces. You will be sewing through three layers (or six pieces of fabric): the long piece and both the top and bottom of the folded short piece that is on the bottom. At the top of the pieces, where the opening is, I like to reverse the stitch then stitch again to reinforce the stitch as this is a stress point for the seam. The seam will be stressed as card are inserted and removed, so reinforcing it can help.

Now flip the pieces and sew on the other edge. It is best to start at the end of the folding pieces and sew towards the edge of the pieces. This will form two pockets of sorts. The folded short piece will form a pocket, and the space between the short piece and long piece will form a pocket, but the bottom of it will be open.

Fold the top short piece back in place, so its bottom edge sits on top its top edge, so it looks like before sewing the bottom pieces. Fold the long piece where the short pieces’ fold sits, with the folded short pieces going along for the ride. Fold the long piece just slightly below the short piece fold line, so that there is some expansion room. Hence, fold it all up, so the bottom two thirds of the long piece are now the bottom half of the whole thing. It will resemble an accordion style wallet. Repeat what you did before, but sewing the other three layers (six pieces of fabric). Pull back the three layers already sewn, so that you are folding the bottom three layers. Start sewing as close to the fold as you can get the sewing machine foot. Stop sewing at the edge of the folded pieces.

Flip over and repeat sewing the other side. Again, fold back the top three layers that have already been sewn, so you are sewing the bottom three layers from the top edge of the folded pieces to as close to the fold as possible.

You will now have an accordion style card holder wallet with five pockets.

Other side of card holder.

Final step is to place a snap or button to allow the top to close over. Do not place the snap too far down on the inner part. Allow some room for expansion when cards are added.

Below is my YouTube video showing how I make them.